

Starting with the basics of concept; What is Firebase?
Google Firebase is a back-end mobile application or development software that enables developers to develop iOS quickly, Android, and other high-quality apps, grow your user base and earn more money.
Firebase provides tools and features for debugging, tracking analytics, hosting, reporting, fixing app crashes or crash reporting, authentication with any user or verified account, cloud messaging, creating marketing and product experiments.
The Firebase provides you with an actual real-time database that lets you build rich and collaborative applications. It also provides details of users that are using it and daily analysis of rendered services.
One of the main problems with Firebase is that it has limited querying capabilities. Firebase real-time database provides no way to filter capabilities because the whole database is a huge JSON file, making it significantly difficult for the user to create complex queries.
MySQL (an open-source relational database management system) is in some ways better than Firebase for multi-row transactions, but Firebase can be a good choice for large data sets.
Any user can easily add Firebase to their application, and hence it will make their online work way more accessible than it was supposed to be. Therefore now we will be discussing various methods of adding Firebase to an android app. There are two ways to add the firebase software to any android app.
First Method to add Firebase in Android Studio
The following are the steps to include Firebase real-time database to Android project in Android studio. The first method is using Firebase Assistant:
- So the first thing any user has to do is update the android studio. The latest version of the android studio should be above version 2.2.
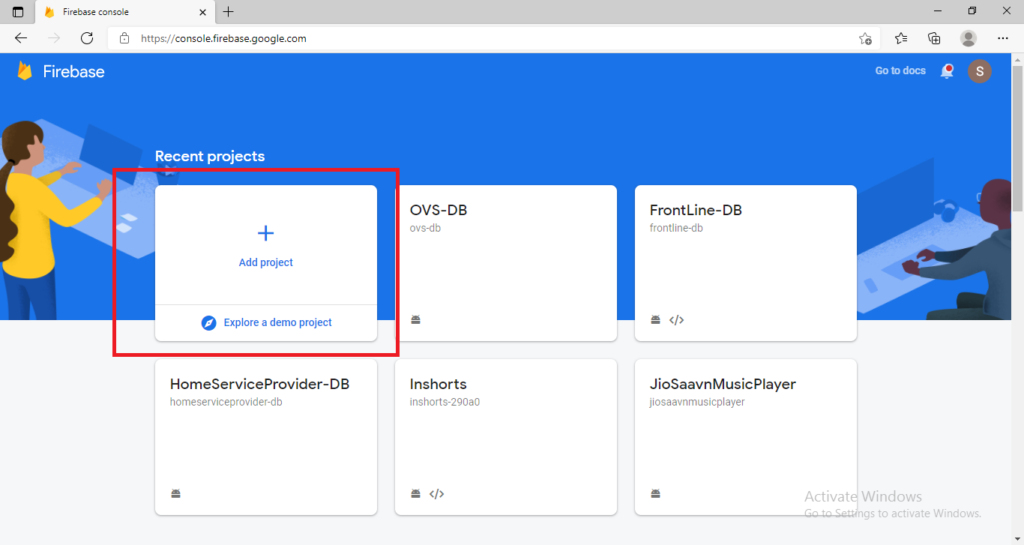
- Once the user has the latest version of Android Studio, they have to click on add project to create a new project in the Firebase.
- Next, the user must open the android studio, select the tools option in the upper left corner of the android studio screen, and then click on the firebase option in the drop-down menu.
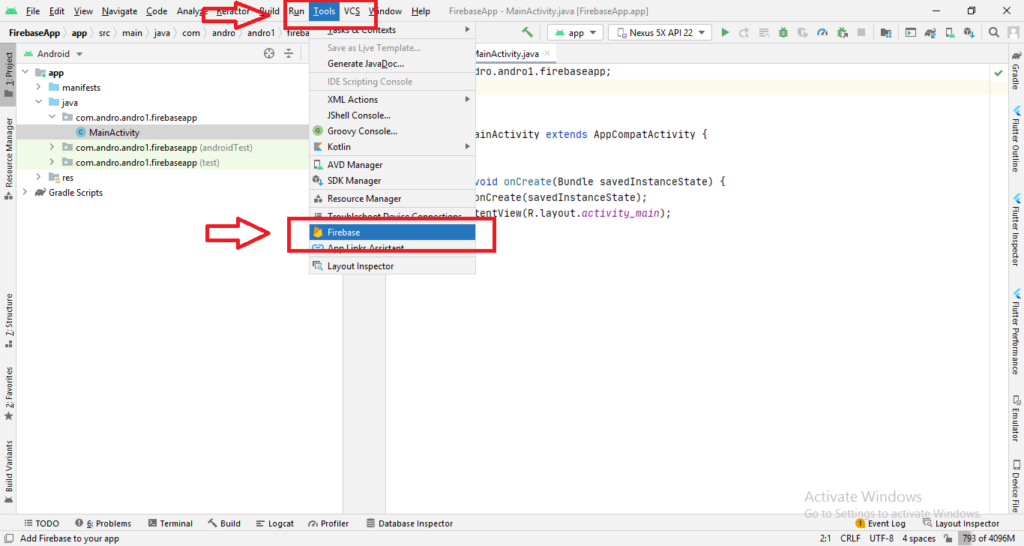
- Once you click on the firebase option, a menu will appear on the right side of the screen, and it will show all the various services that Firebase offers.
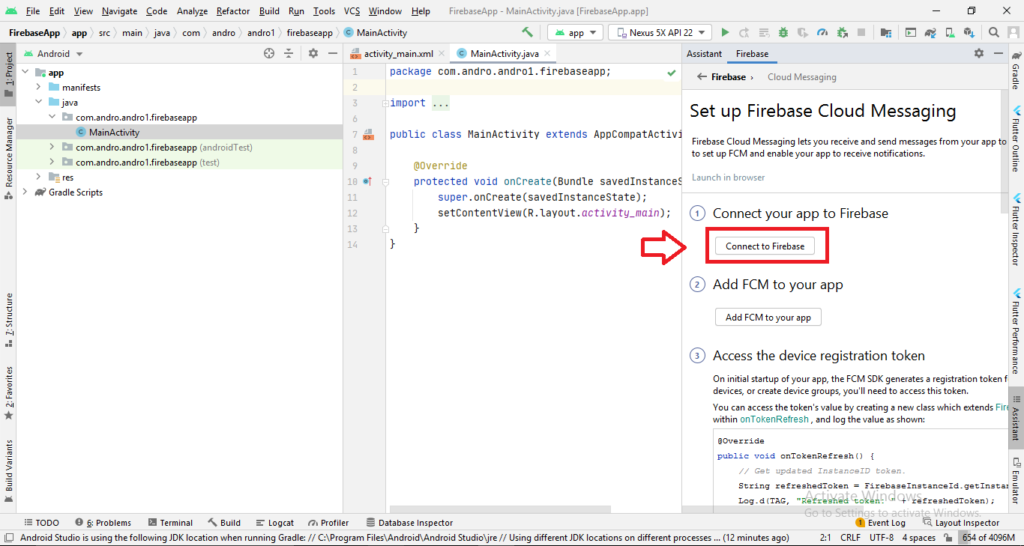
- You have to choose the service you desire and now click on the “Connect to Firebase” option in the menu of your desired service.
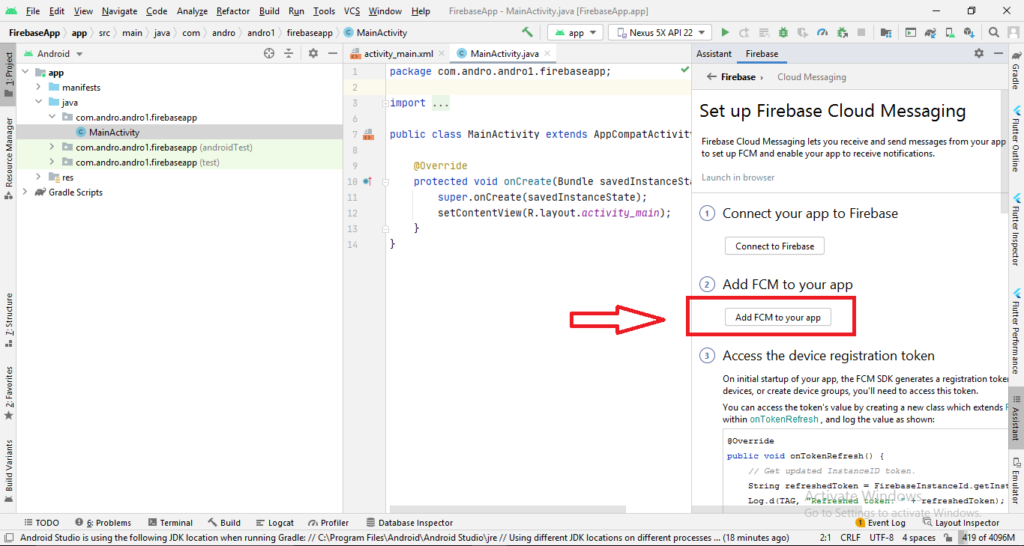
- Add the dependencies of your service by clicking on the Add (desired service name) to the app option.
- Add the code to your android project that are in popup window by “Accept Changes”.
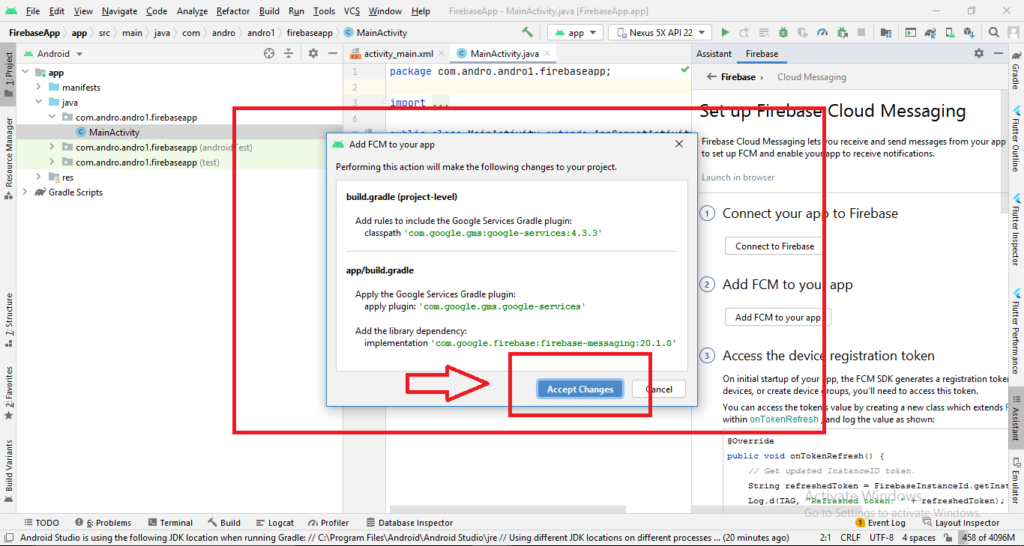
- By following the mentioned steps, you will successfully enable firebase services in your android system.
Second Method to add Firebase in Android Studio
The second method we have is Manually adding the Firebase. The following are the steps:
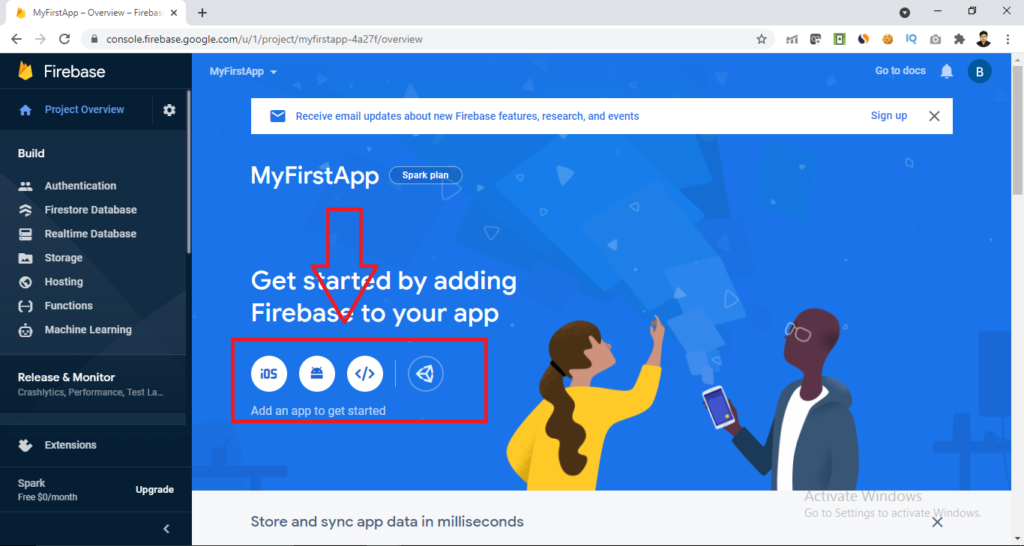
- So here, the user first needs to create a firebase project, so first click on “create project” in the Firebase console.
- Next, give the firebase project name as per your requirement and the click continue. After click on continue button select the account for Google Analytics (Select Default Account from the drop-down) lastly, click on “create project” to create it finally.

- Now, add the created project to the android app and click on the add firebase to your android app icon on the starting window.
- Next, you will see that a prompt will open on where to enter the app’s package name.
- After adding package name, click on “Register App” and then download the google-services.json file.
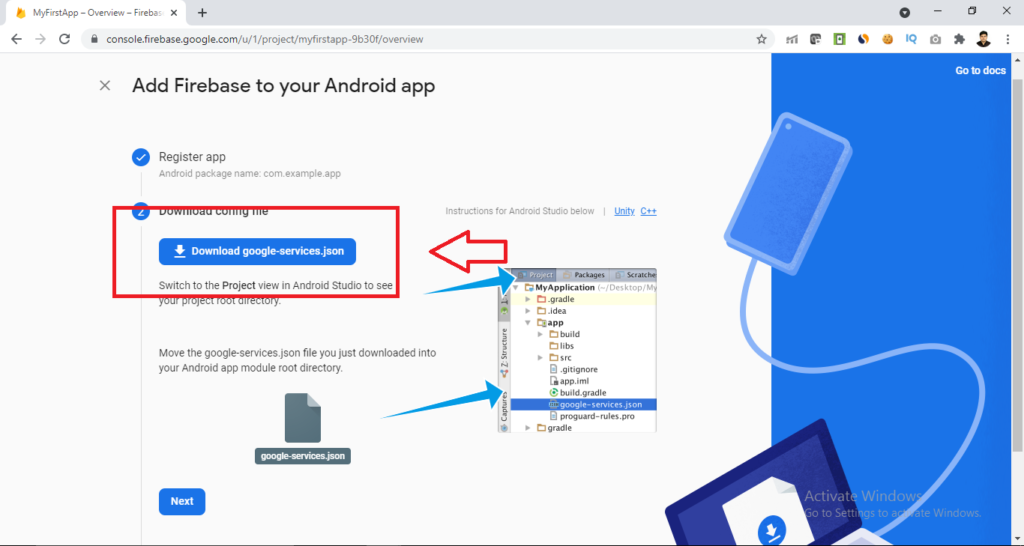
- After this click on “Next” button, add the below code in project level build.gradle file in android studio.
Note :- Same code you can see after click on next button
dependencies {
    ...
    // Add this line
    classpath 'com.google.gms:google-services:4.3.10'
  }
}
- Now add the below code in app level build.gradle file, then click on “Next” button and finally, click on “Continue to Console”
// Add this line
apply plugin: 'com.google.gms.google-services'
dependencies {
  // Import the Firebase BoM
  implementation platform('com.google.firebase:firebase-bom:28.4.0')
  // Add the dependency for the Firebase SDK for Google Analytics
  implementation 'com.google.firebase:firebase-analytics'
  // To Add the dependencies for any other Firebase products
  // https://firebase.google.com/docs/android/setup#available-libraries
}
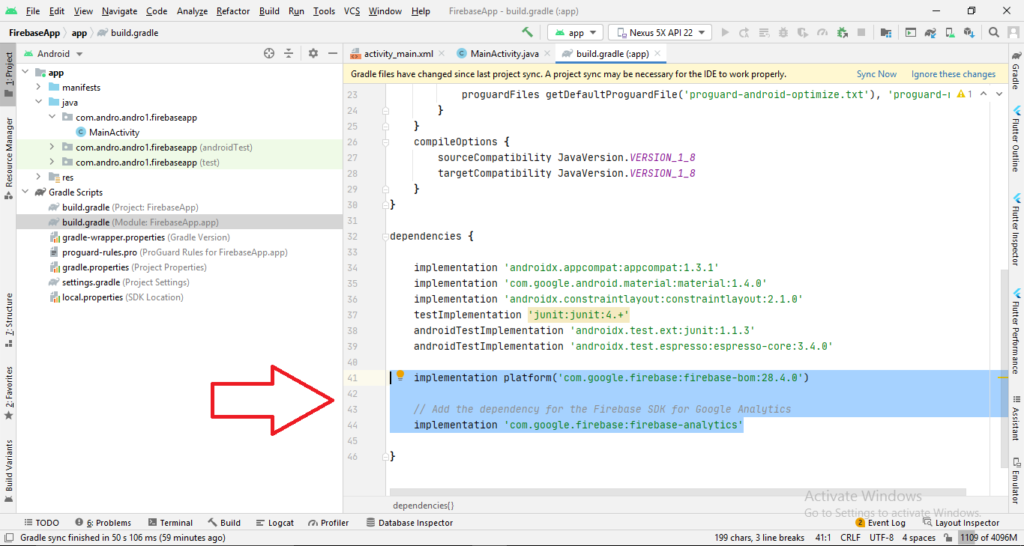
- Now, the user must Sync the Gradle in android project by selecting the option of “sync now”.
After adding the above code, run the app to send the verification to the Firebase console, and the Firebase will now be successfully installed and ready to run.
That is all about Firebase setup in Android Studio. If you want to run Python Script in android studio, then check out this article on Chaquopy.